The ability to remotely log on to a Linux machine is usually fairly straight-forward: You install SSH and openssh-server and then tunnel X with the ssh command. But what if you want a full-blown desktop? You could install a VNC or RDP server, or you could go all out with a complete remote desktop management solution like NoMachine NX. With this solution you can enjoy multi-session remote desktop environments with multi-media support, printing support, and file sharing.
NoMachine NX is available for Linux in both x86 and x86_64 flavors. There is a free version (which will be the version we discuss here) that has pre-compiled binaries for Red Hat flavors and Debian flavors as well as a source download. Check out the download page for more information.
Why would you want to bother with such something like NoMachine NX? Simple, NoMachine offers the most dependable, configurable, user-friendly means of managing remote connections for the Linux desktop. The only drawback to the free edition is that it will only allow two simultaneous connections. In order to gain more you will have to purchase either the Small Business or the Enterprise Desktop editions. For more information on these versions take a look at the NoMachine Product Page.
For many, the free edition should suffice. It is simple to install, configure, and use. Let’s examine each process.
The installation process is fairly straight-forward. For this article, I used an Ubuntu 10.10 desktop. The installation process will be similar for most other distributions. There are, however, a few dependencies you must install first (the missing dependencies will vary, depending upon your distribution). For a Ubuntu 10.10 desktop installation, you will need to install the following:
To install openssh-server, run sudo apt-get install openssh-server . For the installation of libaudiofile0 run sudo apt-get install libaudiofile0 . With these dependencies met, you are ready to install the server, node, and client.
The first step is to download the files. For the Ubuntu distribution download the Debian package (.deb) files (that match your architecture) for the client, server, and node from the Download Page. Once you have those files in your ~/Downloads directory follow these steps:
Once the installation is finished, you will have NoMachine NX up and running on your Linux machine. Now to set up and manage your connections. Naturally you will then want to install the NoMachine Client on the machines you need to connect with. These machines do not have to be a Ubuntu distribution (or Linux for that matter). Also, on the client machines, you do not have to install the server or the node tools.
In most cases, you will find NoMachine NX will work find out of the box. There may be certain options that will need or want to set that do not fit the default configurations. To do this you have to edit the /usr/NX/etc/server.cfg file. Within that file you will find a number of sections that might be of interest. Among those sections are:
You can go through the rest of the 790 line configuration file to see if there are any other options you might need. If you do make any changes to the configuration, you will need to restart the server with the command sudo /usr/NX/bin/nxserver --restart .
You will find the NoMachine tools in the Applications > Internet > NX menu. You will notice there is no entry for the Server. The missing Server entry is because there is no GUI for managing the server.

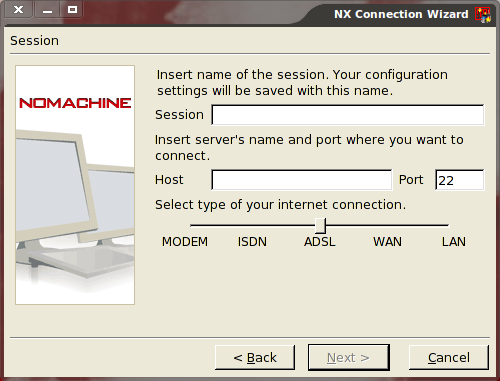
To create a new connection select Applications > Internet > NX > NX Connection Wizard. This Wizard will walk you through the process of quickly setting up your connection. The first screen is merely the Welcome screen, so just click Next. The first screen you will need to interact with is the Session details window (see Figure 1).
In this window you will want to give your session a human readable name, enter the address (hostname or IP Address), change the port if necessary, and select the type of Internet connection. Make sure you pay close attention to the type of connection as it will help determine the quality of graphics used.

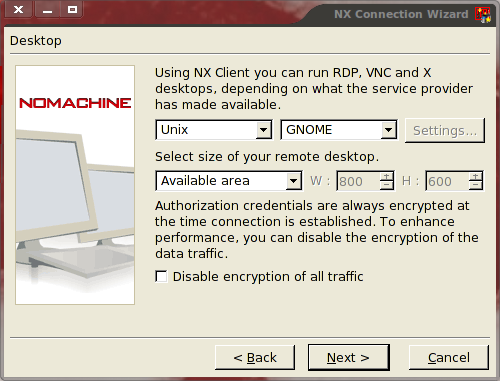
Once you have configured these options, click the Next button to continue on. The next screen (See figure 2) requires you to choose the how the connection is made. You can connect using RDP, VNC, and SSH. This selection is made when you select the operating system from the drop down. For our setup (Ubuntu) select Unix and then select the type of desktop you use (GNOME, KDE, CDE, XDM, or Custom). If you select Custom you will then need to click the Settings button and set up your desktop. NOTE: You can even remote to a console window if you need.
Once you have set this up click Next to continue on. In the final screen there are only two options:

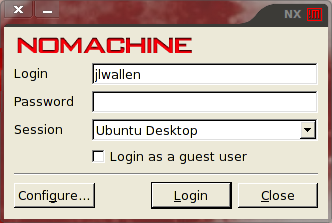
For quick access to your remote desktop I recommend allowing NX to create the desktop shortcut. If you know you need to set some of the advanced options you can select that. If you miss that option you can get to the advanced settings all you need to do is click Applications > Internet > NX > NX Client for Linux. Once the connection window is open (see Figure 3) click on the Configure button to show all of the options for the client.
All you need to do to connect is to enter your user password and click Login. A new window will open (one authentication is complete) with your remote desktop ready.
You will notice this remote connection does not actually manipulate your currently logged on session. So if you think this tool can be used for remote support you will find yourself disappointed.

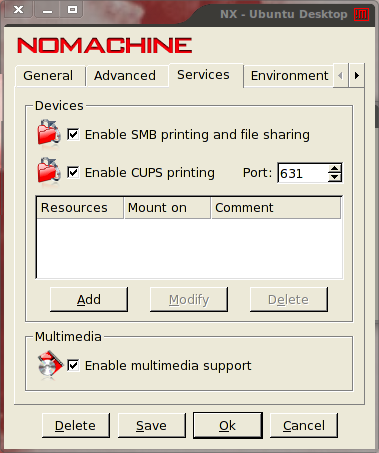
As I mentioned earlier, you can take advantage of printing, file sharing, and multimedia support from your remote machine. To do this you do have to go into the configuration of the connection and click on the Services tab (see Figure 4). If, out of the box, you attempt to enable CUPS printing, you will get an error. Before you do this you need to change the permissions of the /usr/lib/cups/backend/ipp file to 755. Do this with the command sudo chmod 755 /usr/lib/cups/backend/ipp .
Once you have made this configuration, click Save and then OK. You can now take advantage of services and multimedia on your remote machine.
NoMachine NX is an incredible tool for enabling remote desktop access. In fact, you will be hard-pressed to find a better tool for the task. Although the free version is limited to its number of connections allowed, it is still a very useful tool that can be a stepping stone to the paid version should your business find a need.